Info Panel
The Info Panel displays the details of the selected event or task. The Info Panel may appear in any of three locations: in the righthand sidebar, as a floating window, or as a popover in the main calendar view.
Info Panel in Sidebar
The Info Panel can appear in the righthand sidebar, where it’s always available when an event or task is selected. To display the Info Panel in the sidebar if it’s not currently visible, click the Hide/Show Task List button, choose View > Show/Hide Task List, or press ⌘-Option-I. (The pop-up menu on the right side of the Hide/Show Task List button lets you select whether the right sidebar shows the Task List, the Info Panel, or both.)

Info Panel as Popover
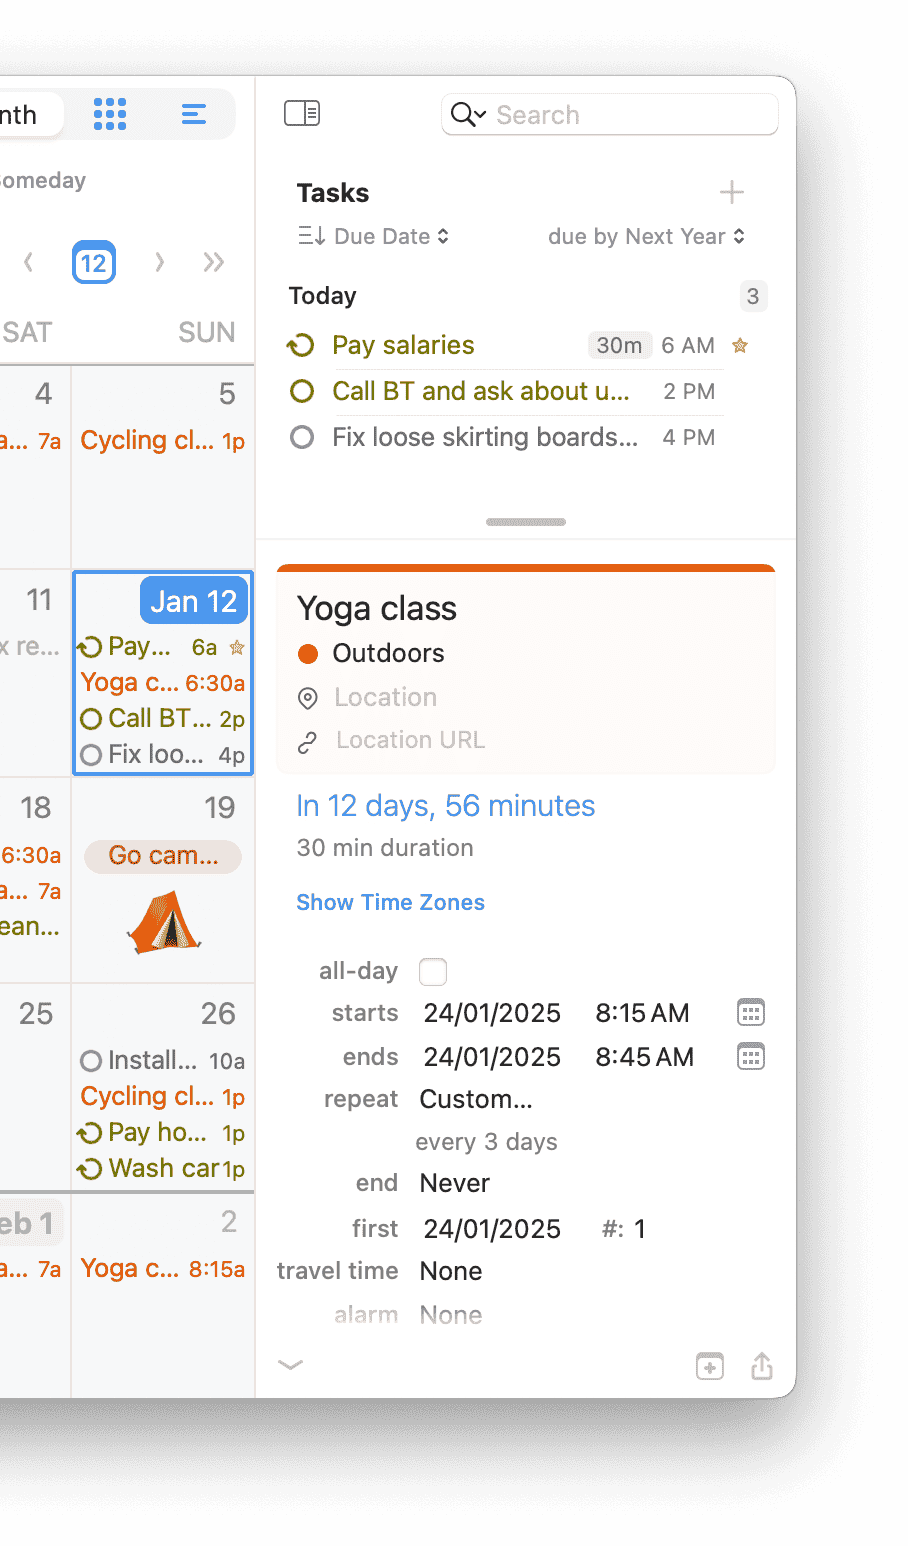
Alternatively, the Info Panel can appear as a popover, which disappears as soon as you click outside it.
- If the Info Panel in the righthand sidebar is hidden (see above), the popover appears when you select an event in the calendar or a task in the Task List and press
⌘-Return, or double-click an event in the calendar or a task in the Task List. If “Open Info Panel for new events” is selected in BusyCal > Settings > Info Panel, the popover also appears when you create a new event or task. - If the Info Panel in the righthand sidebar is visible (see above), the popover never appears.
Info Panel as Floating Window
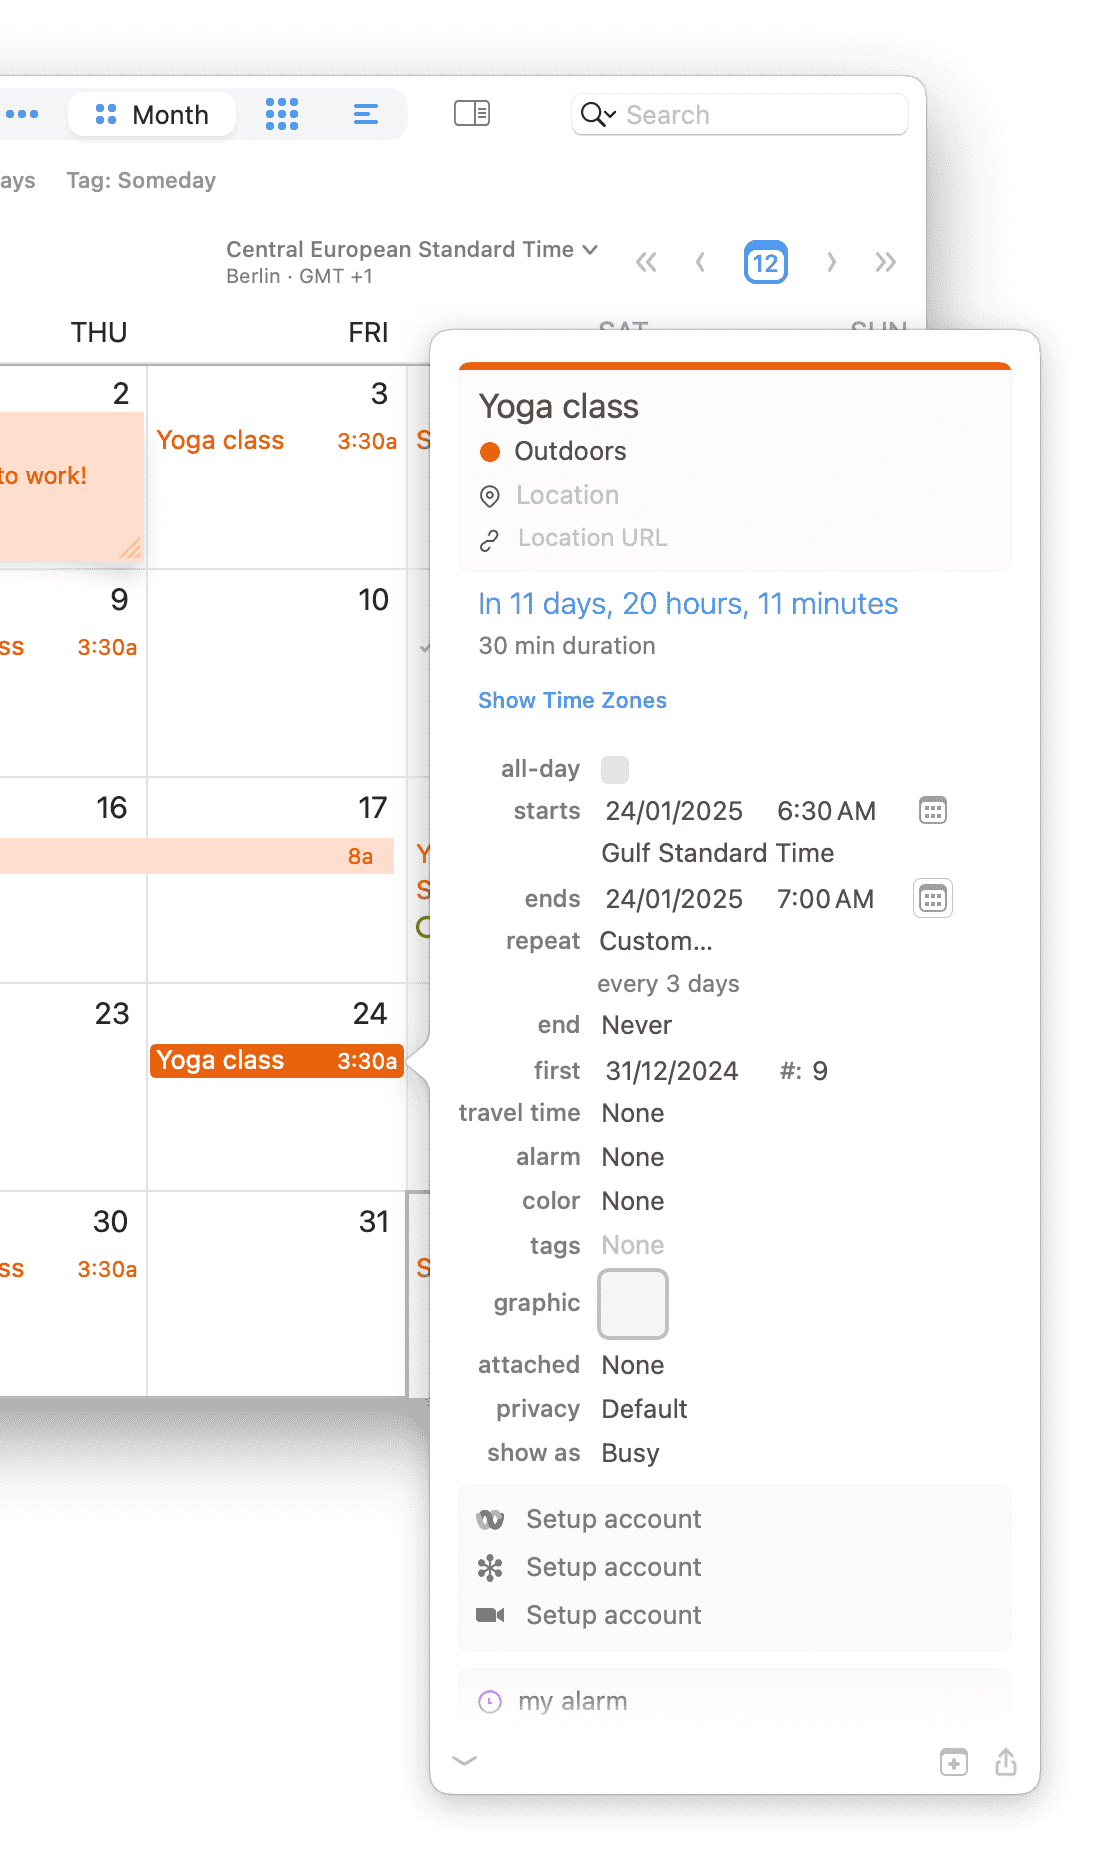
The Info Panel can also appear as a movable, resizable, floating window.
To display the Info Panel as a floating window, first go to BusyCal > Settings > Info Panel and select the “Display Info Panel in floating window” checkbox. Then:
- If the Info Panel in the righthand sidebar is hidden (see above), the floating window appears when you select an event in the calendar or a task in the Task List and press
⌘-Return, or double-click an event in the calendar or a task in the Task List. If “Open Info Panel for new events” is selected in BusyCal > Settings > Info Panel, the floating window also appears when you create a new event or task. - If the Info Panel in the righthand sidebar is visible (see above), double-clicking an event or task opens it in a separate detached window — the same as choosing Get Info in New Window. This lets you keep the sidebar Info Panel in view while inspecting another event side by side.

If you select “Open Info Panel for new events” in BusyCal > Settings > Info Panel and the righthand sidebar is visible, then when you create a new event, the title field is selected in the Info Panel. If the righthand sidebar is not visible and you create a new event, the Info Panel popover or floating window appears, with its title field selected.
Get Info in New Window
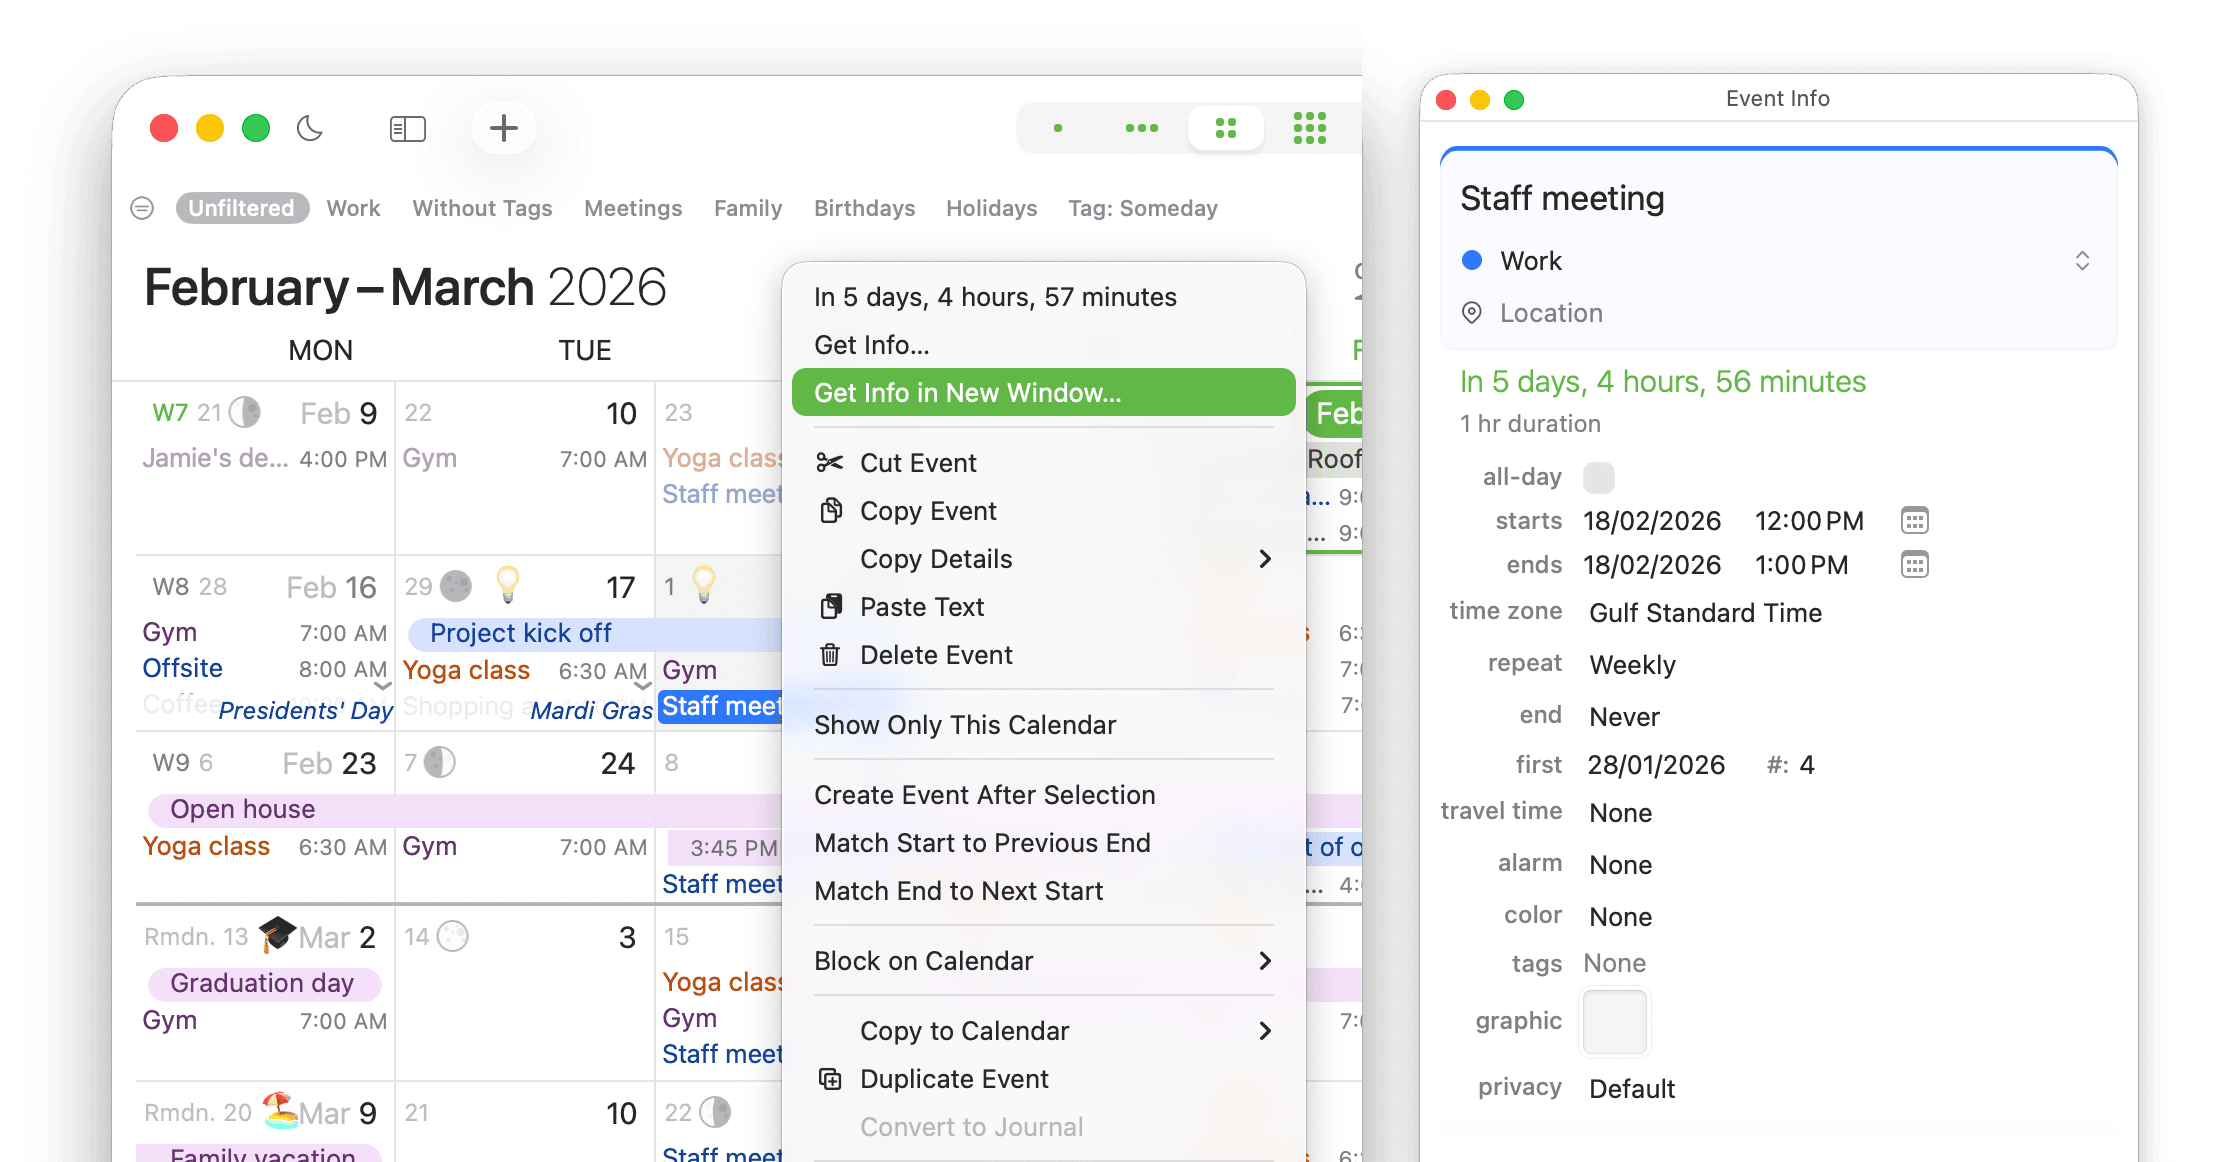
You can Control-click any event and choose Get Info in New Window to open it in a separate window and keep it on screen while you continue working in BusyCal. This command is always available and is also available via Edit > Get Info in New Window….
Info Panel Settings
You can customize the Info Panel to show only the fields you want to see by going to BusyCal > Settings > Info Panel.

The first two checkboxes affect the display of the Info Panel as a whole:
- Open Info Panel for new events — If you select this checkbox and the righthand sidebar is visible, then when you create a new event, the title field is selected in the Info Panel. If Open Info Panel for new events is selected and the righthand sidebar is not visible when you create a new event, the Info Panel popover (or floating window, depending on the state of the next checkbox) appears, with its title field selected.
- Display Info Panel in floating window — If you select this checkbox, BusyCal displays the Info Panel as a floating window rather than as a popover when the righthand sidebar is not visible. When the sidebar is visible, double-clicking an event opens it in a separate detached window so you can view multiple events side by side.
To choose which fields to display, select from the following options:
- Location — Displays a text field for entering location information.
- Location URL — Displays a URL field for entering location URLs, such as a link to Google Maps.
- Start time zone — Displays a time zone menu for the event start time. See Time Zones for more information.
- End time zone — Displays a time zone menu for the event end time. See Time Zones for more information.
- First occurrence — Displays the first occurrence date of a repeating event and current sequence number.
- Travel time — Displays a menu enabling you to see or specify the travel time for that event.
- URL — Displays a URL field for inserting links.
- Tags — Displays a field for entering tags. See Tags for more information.
- Graphic — Displays a field for attaching graphics. See Graphics for more information.
- Attachments — Displays a menu for attaching files.
- Attendees — Displays a field for adding attendees. See Meetings and Invitations for more information.
- Rooms — Displays a picker for browsing and booking meeting rooms. Appears automatically for events on Google Workspace and Microsoft 365 accounts that have room resources configured. Shows room names, buildings, capacity, and live availability for the event's time window.
- Contacts — Displays a field for linking to contacts in BusyContacts.
- Privacy — Displays a menu for choosing the privacy type for the event. When sharing a calendar with others through Exchange, Google, and some CalDAV Servers, events marked Private appear to other people with a title of “Private Event.” The event blocks your free time for scheduling purposes, but no other details are shared. The "Confidential" privacy option is available for some CalDAV servers, in which case the event is completely hidden on a shared calendar. Note that only timed-events can be made private.
This option is enabled only when syncing with a calendar server that supports this feature. It is not supported by iCloud.
- Busy — Displays a checkbox to indicate whether an event affects your availability as free or busy.
- Created time — Displays the date and time the event was created.
- Last edit time — Displays the date and time the event was last modified and the user account that last modified it.
- My alarms — Private alarms that are stored locally and do not sync with other apps and services.
- My tags — Private tags that are stored locally and do not sync with other apps and services.
- My URL — Private URLs that are stored locally and do not sync with other apps and services. You can drag files, email messages, bookmarks, contacts, and other items to the my URL field to create links that open the source document.
- My notes — Private notes that are stored locally and do not sync with other apps and services.
Below is an example of the Info Panel with all fields shown.

Open Links
Select one or more events or tasks in the calendar and choose Edit > Open Links (⇧⌘O) to open all links found in the selected items. BusyCal collects links from these sources, in order:
- URL field — the event or task URL.
- Location URL field — a URL stored in the location URL field.
- Conference join link — a Zoom, Teams, Meet, or other conference link detected from the location text.
- Notes — any URLs embedded in the notes body, including rich-text links with friendly display names.
Duplicate links across these sources are opened only once. When multiple items are selected, links from each item are opened in the order they appear.
Links open in the browser or app configured under BusyCal > Settings > Advanced > Open conference calls in. If no preference is set, BusyCal uses your system default browser.
The menu item is disabled when no selected item contains an openable link.
Notes Link Detection
The Notes field automatically detects phone numbers, web addresses, and other data patterns and turns them into clickable links. This detection is powered by macOS and can be toggled through the Edit > Substitutions menu while the Notes field has focus. If text is being incorrectly detected — for example, a reference number turning into a phone link — you can turn off Data Detectors and/or Smart Links individually. See How do I control automatic link and phone number detection in the Notes field? for full details.
⚠️ Troubleshooting
🛠️ Field not Showing
If you enable a field in the Info Panel but it doesn’t appear, it's likely because the event's calendar account does not support that field. In such cases, BusyCal automatically hides unsupported fields to prevent confusion.
BusyCal offers special My Tags, My Notes and My Alarms fields that can be enabled for any account. Use these when
Tags or Alarms are natively not supported by the underlying account. The only downside is that these fields do not sync
between devices and remain locally on your device.
Some known fields and the services that do not support them:
🛠️ Feature Support Matrix
The table below indicates where a feature is natively supported (✓) or provides developers with the ability to sync this information between devices, and where it is not supported (✗) at all.
| Feature | Reminders | iCloud (CalDAV) | Google Calendar (CalDAV) | Google Task | Todoist | Outlook / Exchange / Microsoft Todo |
|---|---|---|---|---|---|---|
| Task Priority | ✓ | ✓ | ✗ | ✓ | ✓ | |
| Task Due Time | ✓ | ✓ | ✗ | ✓ | ✗ | |
| Task Duration | ✗ | ✓ | ✗ | ✓ | ✗ | |
| Task Starred | ✗ | ✓ | ✗ | ✗ | ✗ | |
| Task Status | ✗ | ✓ | ✗ | ✗ | ✓ | |
| Repeat | ✓ | ✓ | ✓ | ✗ | ✓ | ✓ |
| Tags | ✗ | ✓ | ✓ | ✗ | ✓ | ✗ |
| URLs | ✗ | ✓ | ✗ | ✗ | ✓ | ✗ |
| End Time Zone | ✗ | ✓ | ✗ | ✗ | ✗ | ✓ |
| Floating Time Zone | ✗ | ✓ | ✗ | ✗ | ✓ | ✗ |
| Color | ✗ | ✓ | ✓ | ✗ | ✓ | ✗ |
| Attachment | ✗ | ✓ | ✓ | ✗ | ✗ | ✗ |
See Also
- Getting Started with BusyCal - Overview of Info Panel functionality
- Info Panel Settings - Configure Info Panel display options
- Keyboard Shortcuts - Info Panel keyboard shortcuts
- Tasks - Learn about task-specific fields in the Info Panel
- Event Types - Different types of events you can create